TotalCommercial.com

Help Center · Listings

How to Edit or Unpublish a Live Listing

Change the price or other details of a listing that is already live, take a listing off the public site, and publish it again later.

Last updated October 2026 · 2 minute read

Before you start

You can edit a listing while it is live. Visitors keep seeing the last saved version until you select Save Live Changes. Unpublishing takes the listing off the public site and keeps everything you entered.

Open the listing

  1. On your Dashboard, select Listings.

  2. Find the listing. The search box narrows the list as you type.

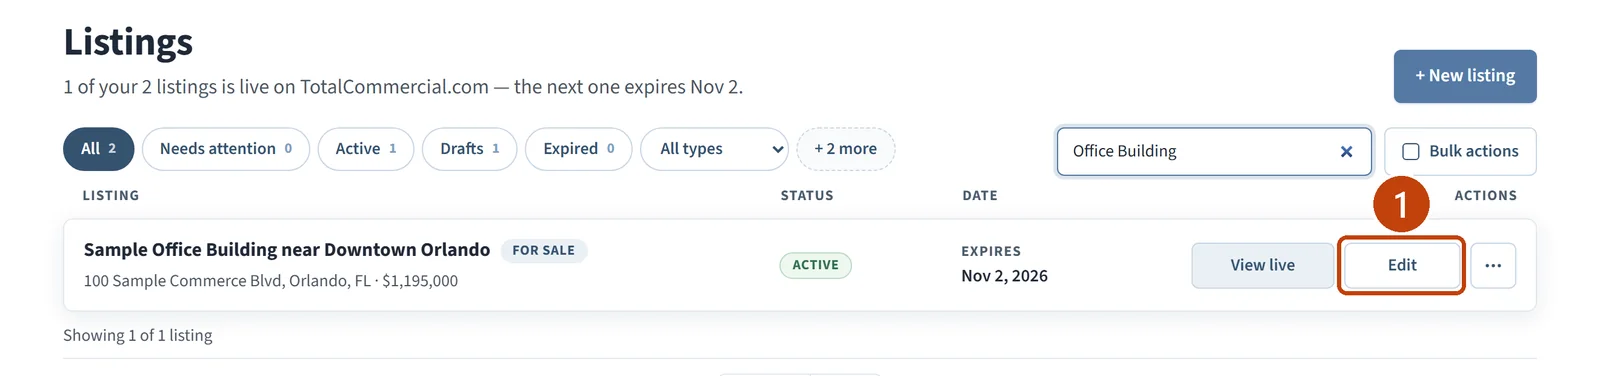
  3. Select Edit on its row.

The Listings page showing one active listing with the Edit button marked.
Edit (1) on the listing row.

Find your way around the edit page

The edit page opens. The badge beside the title shows whether the listing is Live and when it was last saved.
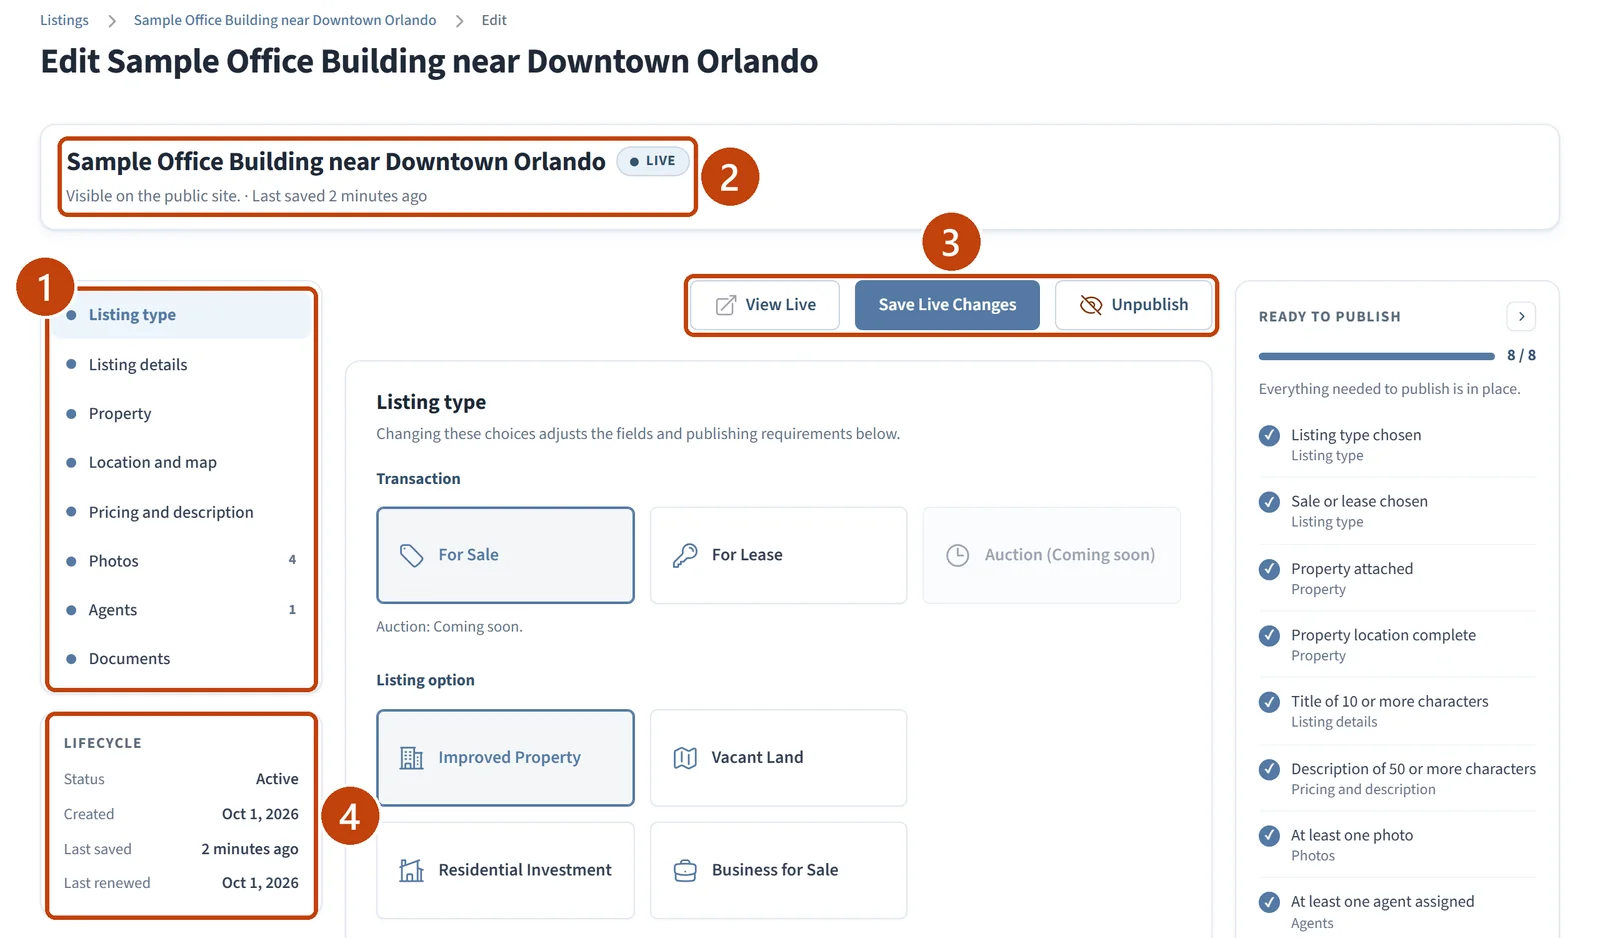
The edit page for a live listing, showing the section list, the Live badge, the action buttons, and the Lifecycle panel.
The section list (1), the Live badge and last saved time (2), View Live, Save Live Changes, and Unpublish (3), and the Lifecycle panel (4).

Change the details

  1. Select a section in the list on the left, for example Pricing and description.

  2. Change the field. For a price, enter whole dollars with no cents in Sale Price.

The other sections work the same way. Under Property, the heading Property details for this listing covers the address, building size, and land size. Changes there apply only to this listing.
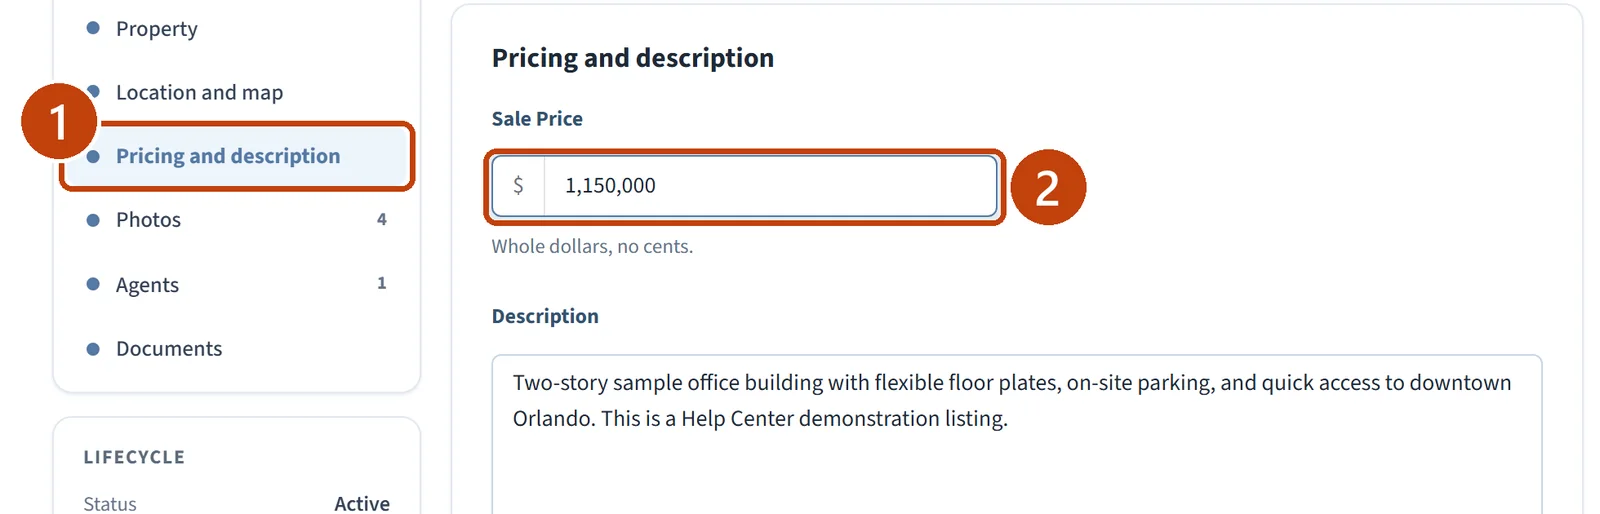
The Pricing and description section with the section name and the Sale Price field marked.
Pricing and description (1) and the Sale Price field (2).

Save your changes

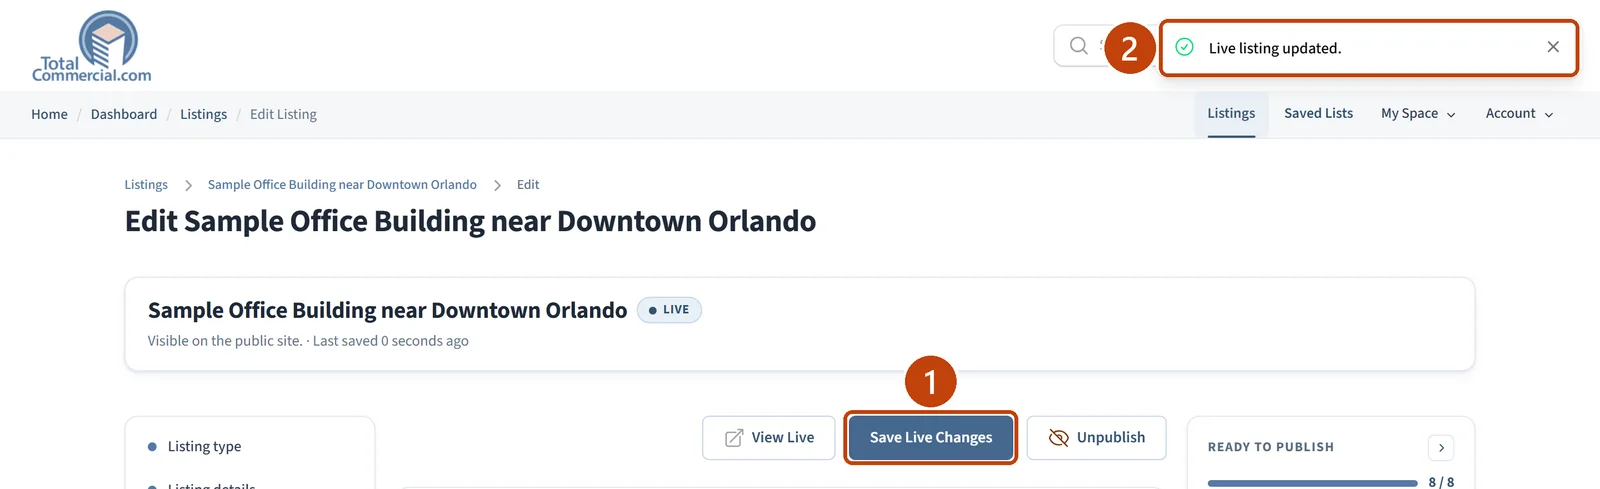
  1. Select Save Live Changes.

The edit page after saving, with Save Live Changes marked and the message Live listing updated.
Save Live Changes (1) and the confirmation “Live listing updated.” (2).

Check the public page

  1. Select View Live to check the public page.
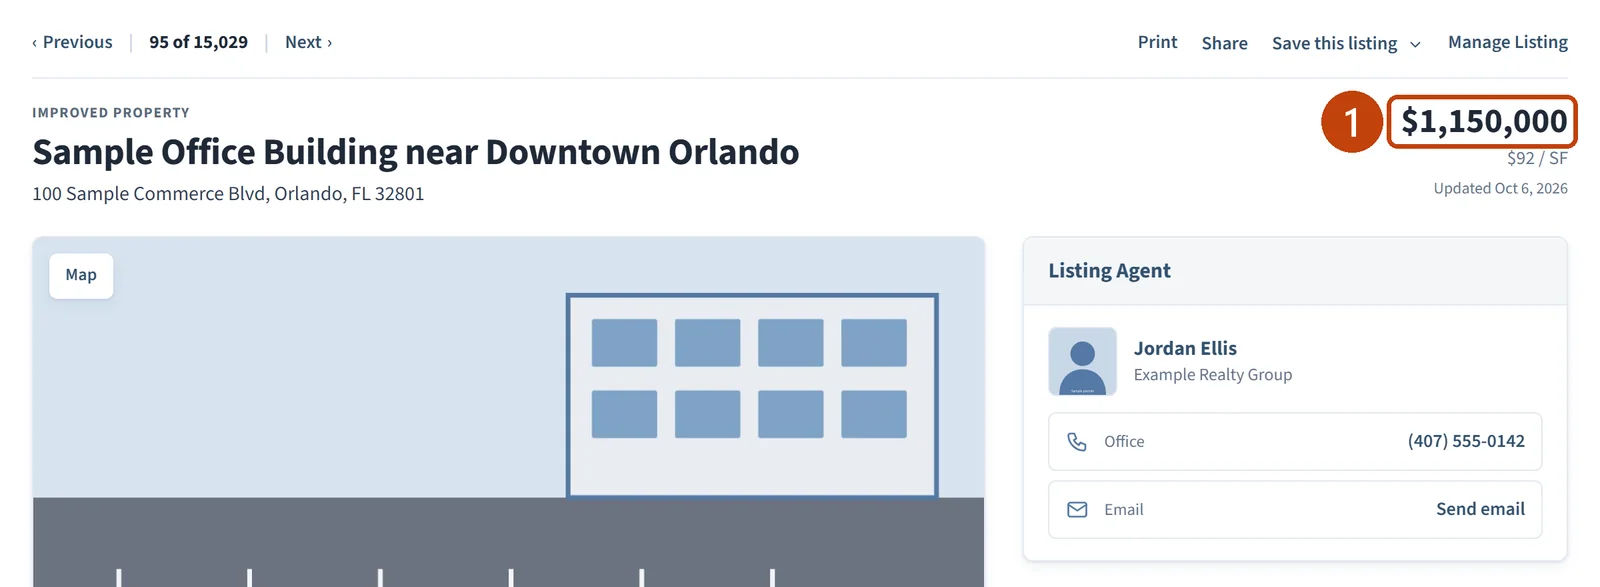
The public listing page showing the new price.
The new price (1) on the public page.

Unpublish the listing

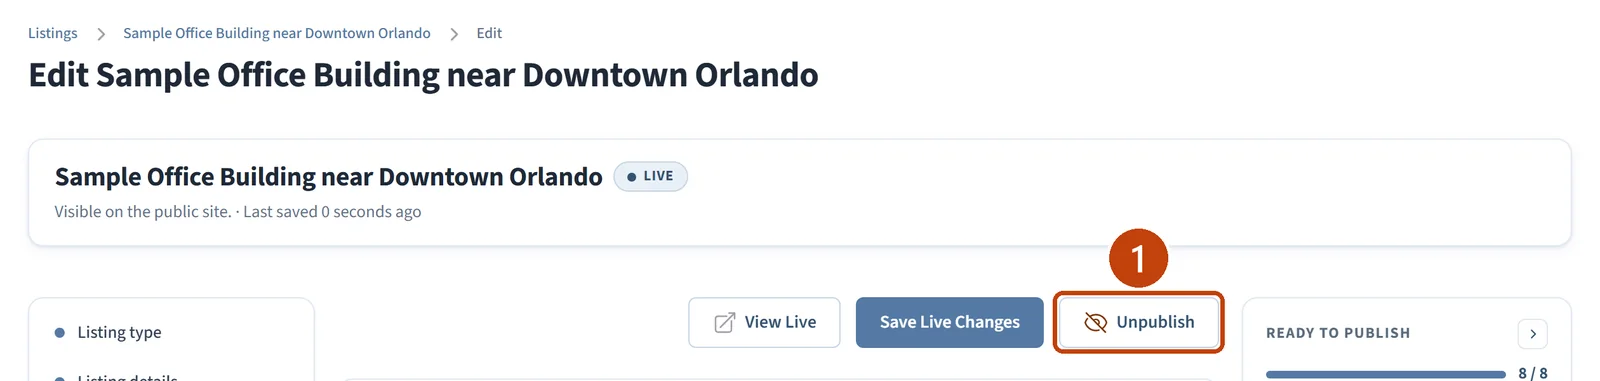
  1. On the edit page, select Unpublish.

The edit page with the Unpublish button marked.
Unpublish (1).

Confirm unpublishing

  1. In the “Unpublish listing?” box, select Confirm.
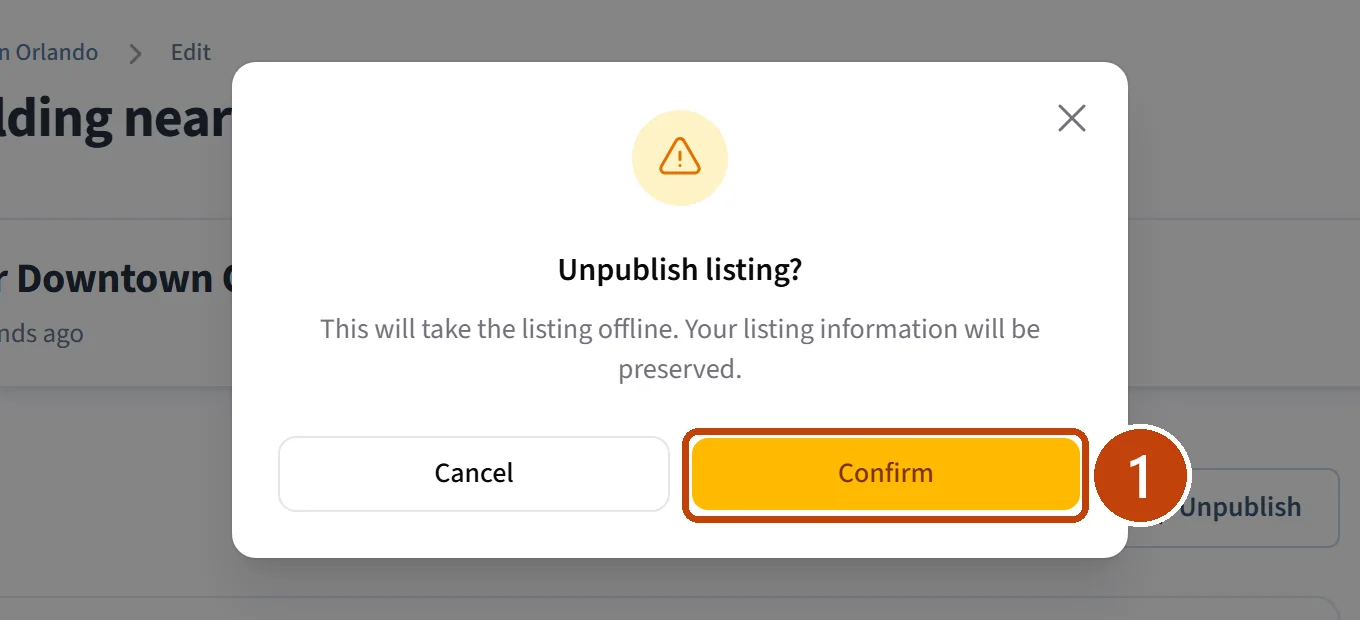
The Unpublish listing confirmation box with the Confirm button marked.
Confirm (1). Your listing information is preserved.

What changes after unpublishing

The message “Listing unpublished.” appears. The badge changes to Draft, and the buttons change to Preview, Save Draft, and Publish.
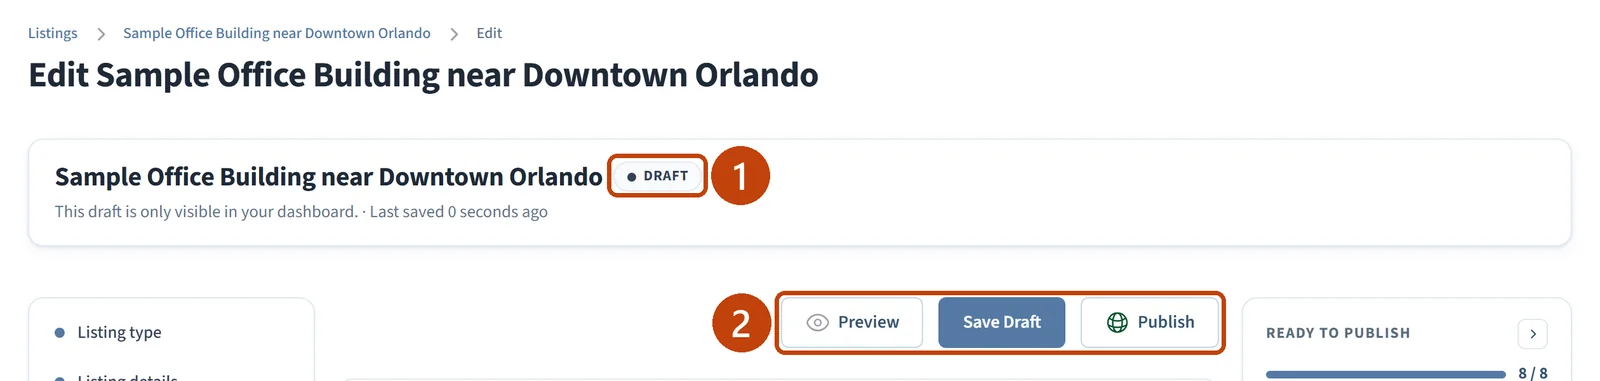
The edit page after unpublishing, showing the Draft badge and the Preview, Save Draft, and Publish buttons.
The Draft badge (1) and the draft buttons (2).

What visitors see

A draft is only visible in your dashboard. Anyone who opens the old public address sees “Page not found”.
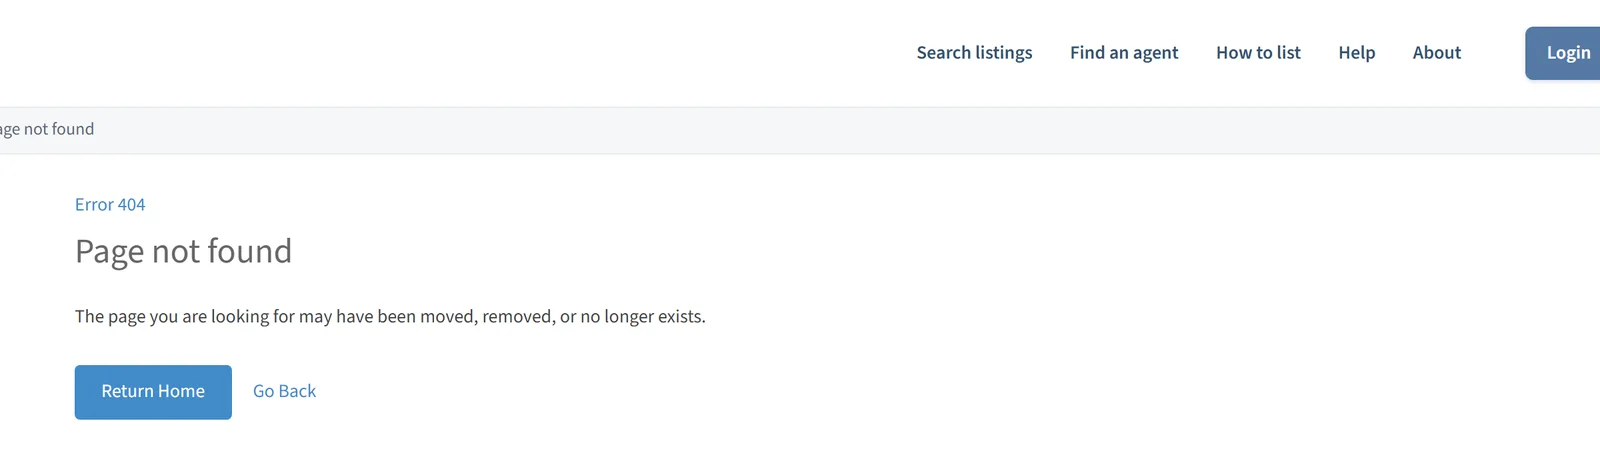
The Page not found page a visitor sees at the address of an unpublished listing.
What a visitor sees at the listing’s old address.

Publish it again

  1. On the Listings page, find the listing. Its status is Draft.

  2. Select Publish on its row, then confirm.
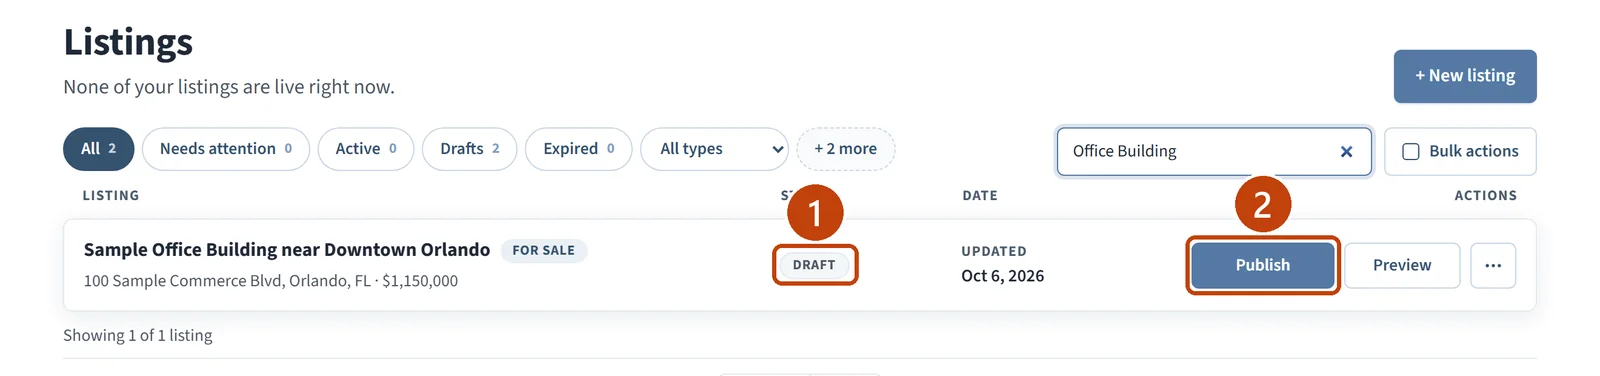
The Listings page showing the unpublished listing as a draft, with the Draft badge and the Publish button marked.
The Draft status (1) and Publish (2).

Confirm it is live again

The message “Listing published.” appears. The listing is Active again with a new expiry date.
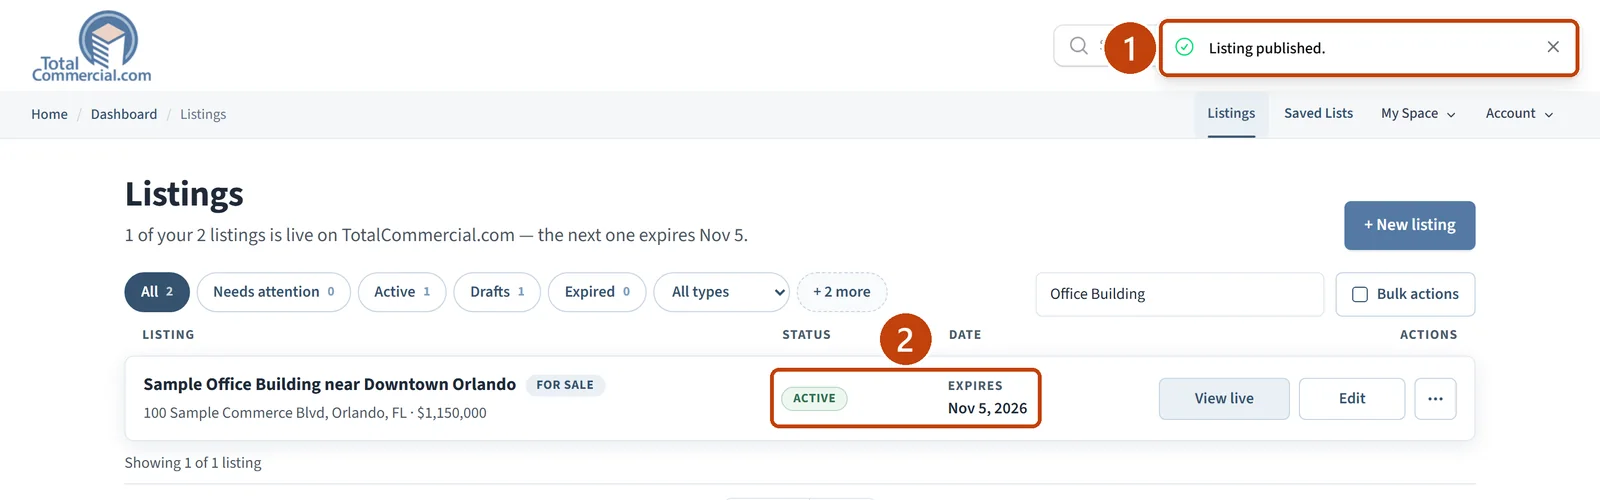
The Listings page after publishing, showing the Listing published message, the Active status, and the new expiry date.
The confirmation (1) and the Active status with its new expiry date (2).

If something is not working

  • The public page still shows the old details. Check that you selected Save Live Changes, then reload the public page.

  • A draft shows Subscribe instead of Publish. Publishing needs an active Listing Entry subscription.

Related articles